Open topic with navigation
M3602A Initial Setup
This topic covers the M3602A license and software configuration:
Add License to Product
It is assumed that the M3602A software has been downloaded and installed onto your PC.
- Navigate on the PC to where the M3602A software has been installed. A common folder for the software is labeled, Keysight M3602A. Within that folder will be the Keysight M3602A.exe, which can be launched.
- When the software is first launched, a dialog opens requesting that the software license associated with the software be linked to it.
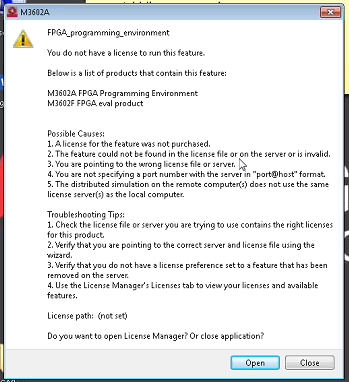
- In the dialog box, open the License Manager.
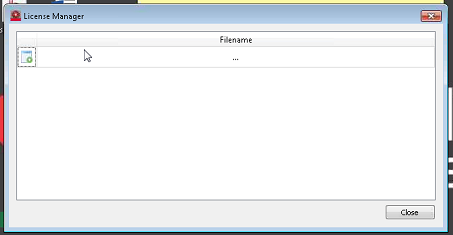
- Click the icon to the top left of the License Manager window.
- Navigate to where the software license is located on the PC.
- Highlight the license and click Open.
- A "License loaded successfully" message appears, click OK to dismiss it.
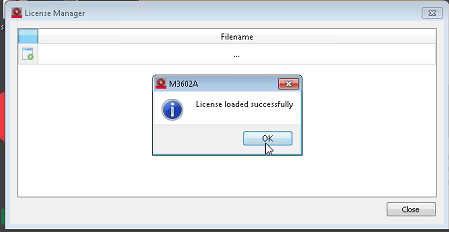
- The license will appear in the License Manager window, which can now be closed.
- The software will try again to find the license. Having now found it, the M3602A software will open.
Vivado 2015.2 Installation
- To download the Vivado 2015.2 software, go to https://www.xilinx.com.
- Go to "Products"
- In the search bar enter "Vivado", and from the drop down, select "Vivado 2015.2 download", or search on that if it is not among the selections.
- Follow directions for installing the software on the PC.
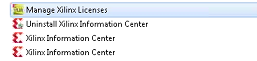
- Once installed, a Xilinx Web Pack license needs to be obtained to associate with the software. To do this, create a new user by clicking the new user icon as shown below.
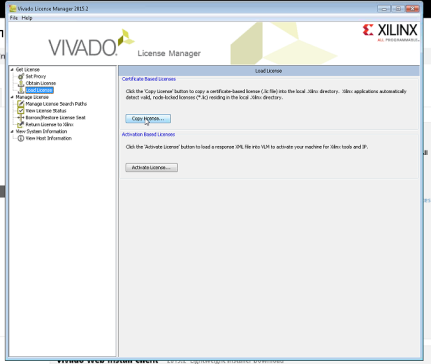
- Navigate to the Xilinx License Manager on the PC. For example:
- Once the Xilinx License Manager has been opened, the license can be associated with the software:
- Once the Xilinx License is associated with the Vivado 20152 software, open the Keysight M3602A software to check the configuration settings.
- Navigate File > Settings to check that the Vivado path is set correctly. For example:
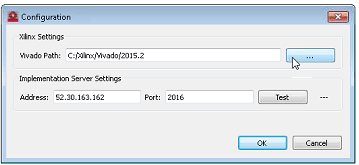
- Check the path shown in the Vivado Path: text box is correct. If incorrect, select the Browse button and navigate to the correct folder.
Cloud Server Connection
- Navigate File > Settings as in step 9 above.
- Enter the IP address of the server and port provided with the M3602A software carefully in the Address and Port text boxes.
- After clicking the Test button, an OK icon will appear to the right of the Test button.